Work Breakdown
-Pre production
-Cloth and simulation pipeline
-VFX supervision
-Outsource management
-Engine integration
-Environment Art
-Pre production
-Cloth and simulation pipeline
-VFX supervision
-Outsource management
-Engine integration
-Environment Art
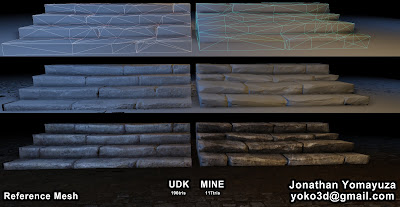 Due to the level designers needs, time constraints, and asset priorities I suggested that we used the default UDK Stairs mesh as place holders. I then created my own stair set keeping in mind the proportions of their asset, this way once I had completed my asset all that was needed to do is simply replace their mesh with mine without any setbacks.
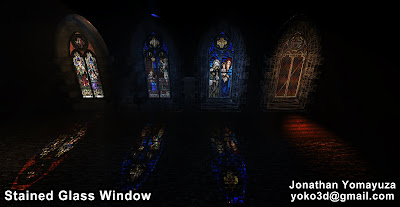 I used the same approach on the stained glass window as I did here Which consist of using 1 texture page for all 3 different glass panels instead of 3. This way by shifting the texture coordinates of the material instance you avoid bringing in multiple textures.
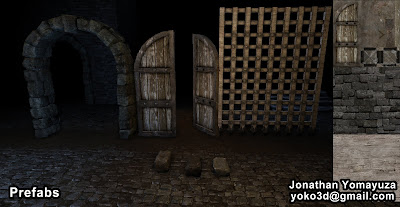 Here I break up some of the meshes I used within these prefabs.
 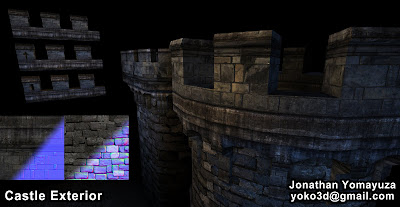 The castle exterior mostly consisted of 2 tiled textures, both the turrets and battlements were unwrapped carefully to avoid having any seams. In other words the 3 different versions of the battlements all snap together with out any texture or geometry seams due to the unwrap and modeling on grid. For the left texture I used a combination of Xnormal and nDo Photoshop filters to create the normals, the texture on the right is explained on my previous blog post.
 The following images are different view modes to show how the tiled material is affected by light.


 Note: Only the assets being affected by the different view modes are mine, the rest are udk assets.
 I started of this model in Zbrush using ShadowBox. I sculpted it into shape and laid out some base colors.
 Using the previous ztool I created a damaged version of it.
 I sculpted a bean out of a Sphere3D, duplicated the sub tool and changed the size and orientation for a varied result. I then used the spray stroke to quickly layout multiple ztools on the document.
 Aside from the base colors I painted in zbrush, the rest of the texturing was done within Photoshop.