In order to save time the stairs above are built using the same stone mesh that I used to create the tiled floor texture (seen in the images bellow)
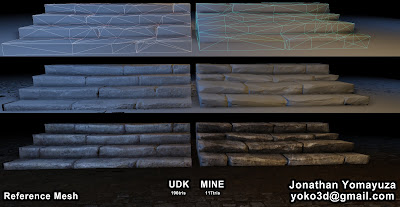 Due to the level designers needs, time constraints, and asset priorities I suggested that we used the default UDK Stairs mesh as place holders. I then created my own stair set keeping in mind the proportions of their asset, this way once I had completed my asset all that was needed to do is simply replace their mesh with mine without any setbacks.
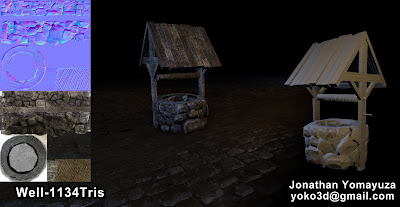
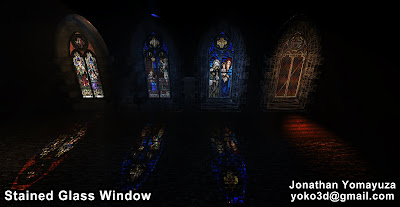 I used the same approach on the stained glass window as I did here Which consist of using 1 texture page for all 3 different glass panels instead of 3. This way by shifting the texture coordinates of the material instance you avoid bringing in multiple textures.
 Due to the level designers needs, time constraints, and asset priorities I suggested that we used the default UDK Stairs mesh as place holders. I then created my own stair set keeping in mind the proportions of their asset, this way once I had completed my asset all that was needed to do is simply replace their mesh with mine without any setbacks.
 I used the same approach on the stained glass window as I did here Which consist of using 1 texture page for all 3 different glass panels instead of 3. This way by shifting the texture coordinates of the material instance you avoid bringing in multiple textures.
To save the level designer time I created prefabs. For those that are not familiar with prefabs, the quickest example I can think of is a mold. Prefabs may consist of multiple meshes arranged and grouped in a certain manner within the editor, or even better a set of actions with meshes (such as a matinee of an opening door) that can easily be duplicated and moved as one.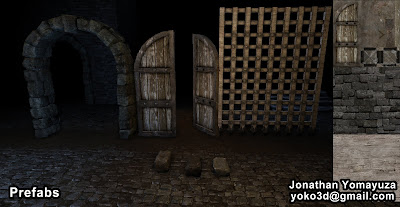 Here I break up some of the meshes I used within these prefabs.
 Here I break up some of the meshes I used within these prefabs.
Note to keep a consistent look, save memory, and time some of the meshes cross reference textures. One example being the spikes on the door texture page are being referenced by the gate mesh as well, by using material ID's.
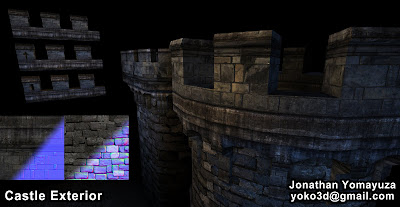 The castle exterior mostly consisted of 2 tiled textures, both the turrets and battlements were unwrapped carefully to avoid having any seams. In other words the 3 different versions of the battlements all snap together with out any texture or geometry seams due to the unwrap and modeling on grid. For the left texture I used a combination of Xnormal and nDo Photoshop filters to create the normals, the texture on the right is explained on my previous blog post.
This is a playthrough of Dead Plague, here you can see my assets in game. Some of the assets that are not showcased in the images above, but are seen in the video include; the jail cell, jail door, and stained glass variations.

